Thursday, January 10, 2013

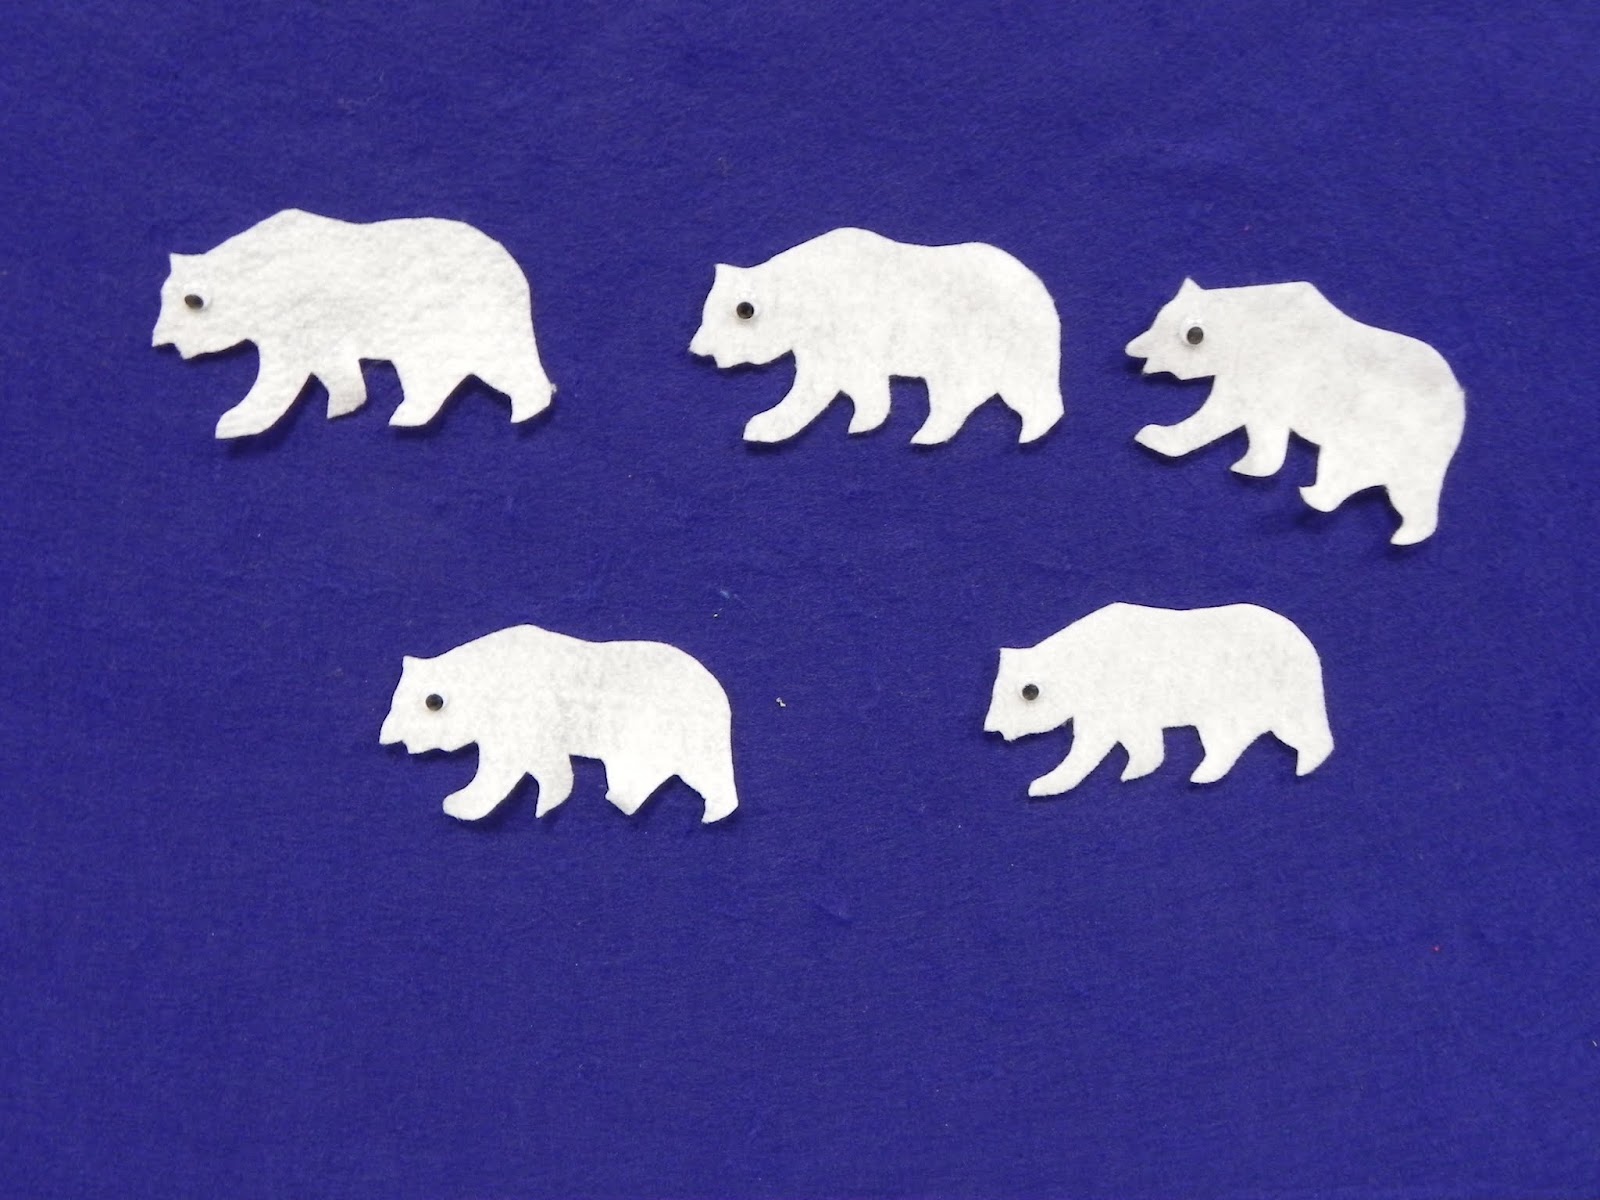
Flannel Friday-Five Little Polar Bears

I do a lot of work with 2 year olds, so I love anything that is a cumulative rhyme (counting ones work well with this).  They seem to follow along better and participate by shouting out what number we are on, which holds their attention.


Five Little Polar Bears

Five little polar bears, playing near the shore.
One tumbled in, and then there were four.

Four little polar bears swimming in the sea.
One chased a seal, and then there were three.

Three little polar bears, what shall we do?
One went swimming and then there were two.

Two little polar bears playing in the sun,
One took a nap and then there was one.

One little polar bear, not very old.
Where's my mom?  I’m hungry and cold.


To make your own polar bears like I did, I ran a bear AccuCut die through the machine with white felt.  I added googly eyes, because they are fun!

Today's bonus rhyme is Four Little Snowman.  We had such fun with it in story time today that I had to share.  The pictures are just laminated Microsoft Publisher clip art that are laminated.


Four Little Snowmen
 
Four little snowmen riding on a sled
One fell off and bumped his head.
Frosty called the doctor and the doctor said,
"No more snowmen riding on that sled!"
(Continue in this fashion until you get to zero.)


The Flannel Friday round-up this week is hosted by Kay at Storytime ABC's (and it is her 100th post)!

Wednesday, January 2, 2013

Flannel Friday Round-Up

Happy 2013!  We have a great round-up today.

A big Flannel Friday welcome goes out to our newbies Lisa and Jen!

Lisa has created a flannel All You Need for a Snowman magic trick to go with Alice Schertle's book.  Honestly, I would love my own magic bag.

Jen at Jen in the Library brings us the Australian version of A-Hunting We Will Go.  This would be a great addition to any animal or multicultural story time.

--------------------------------------------------------------------------------------------------------------------------

Are you looking for some new props?  Andrea created food chain stacking cups.  While they are great for story time, I can also see them fitting Common Core Standards.  I always like it when I can inject some nonfiction into story time.

You have 11 months to get ready for Thanksgiving!  Sarah at Read Rabbit Read presents Five Little Pumpkin Pies in the Bakery Shop.

Bridget at What is Bridget Reading? was inspired by a past post and recreated Conejito by Margaret Read MacDonald.  I love the cute animals (and the mommy bunny with glasses is awesome).

I love any post that uses the words "favorite" and "2012".  Katie at Story Time Secrets shares her Favorite Story Time Props of 2012.  This post is definitely a "keeper" because she has some that I never thought of before.

Katie brings us Froggy se viste or Froggy Gets Dressed.  I know that this is a big preschool favorite up here where we get snow and have to wear many layers.  To make it easier to bring Spanish to your programs, she even includes a pattern.

If you are working on your winter story time flannelboards, you will want to check out Linda at Notes from the Story Room with her version of There Was a Little Penguin.  It's almost as if she knew that I have been assembling penguins for story time today!

Have you ever held a flannelboard workshop?  Lucy at In the Children's Room tells us about one that she and Katie from Storytime Secrets held.

--------------------------------------------------------------------------------------------------------------------------

Were you a part of the first ever Storytime Swap?  If not, you will definitely want to check out some of the posts below (and participate next time).

Anne at So Tomorrow created more shadow puppets to tell the story of Arthur's Nose.  I can see a lot of us pulling out our overhead projectors to create this fun puppet show!

Ann has a guest post up on Storytime ABC's with her props for Mouse Count.  It is really cute and I can see a lot of us putting one together.

Katie B. also has a guest post up on Storytime ABC's with her flannelized version of Five Pairs of Socks.  You will want to check this one out as Katie also created a flannel washing machine!

I made Pete the Cat with a twist here at Libraryland.  Pete has his very own pizza box flannelboard so kids can play with him.  Plus, I have 47 more pizza boxes to go so I see a lot of future pizza box flannelboards.

Kay at Storytime ABC's (and the creator of the Storytime Swap) created a really neat felt memory game out of shapes and colors.  It can be a game, a flannelboard, or even adapted to a cookie story time.  This one has the potential to take us in many more directions (really, can't you just see alphabet cookies???).

Amy at Catch the Possibilities retells Mouse Paint with props.  Honestly, what is cooler than props?  I can't wait to make this one myself!

I will admit it-I shamelessly "borrowed" this one from the Storytime Swap page.  Valley Storytime posted their flannelized version of "The Fish with the Deep Sea Smile" by Margaret Wise Brown.

-------------------------------------------------------------------------------------------------------------------------

Want to know more about Flannel Friday?  Check out the offical blog or Pinterest page. 

Upcoming dates to mark on your calendar include:
  • 1/25/13 is the Valentine's Extravaganza
  • 3/1/13 is the Dig Into Reading Summer Reading Extravaganza
  • 3/15/13 is the Flannel Friday Birthday Extravaganza

Storytime Swap

For our first ever Storytime Swap, I decided to make Pete the Cat with a twist.  We have a family literacy program coming up in March and I was looking for ways to make flannelboards more accessible.  I saw somewhere online where a teacher created pizza box flannelboards and my Pete the Cat idea was born.

I started off with a 10x10 pizza box.  You can try asking your local pizza places for empty boxes or you can buy them in bulk at Gordon Food Service.  I now have 47 empty pizza boxes waiting for a fun idea.  I cut a piece of felt to fit the top of the box and used Tacky spray glue to attach it.  Next time I would probably use a darker color as the flannel background.

 
Next, I took a pattern that I created in April and shrunk it down to fit the 10 inch pizza box.  (If you would like your own pattern, please send me a message.)
 
 
Here is Pete the Cat.


Oops, he stepped in strawberries and now has red shoes. 
(If you read the story, he also has white, brown, and blue shoes.)
 
 
Here is Pete with his four groovy buttons.
 
 
Pete's ready for a little baseball coming in his new book         
Pete the Cat: Play Ball (February 2013).
 
All of these cool costumes are stored in plastic baggies inside the pizza box.  I am running a little behind on getting this to the post office, so my swap partner will get this sometime next week.

Wednesday, December 26, 2012

Flannel Color Books

I have a 4 month old niece and nephew and this year for Christmas I decided to make them flannel color books based on this idea.  If you are going to do something like this, don't start December 1st.

The letters are all made from the Cricut Birthday Bash cartridge.  They are 1 1/2 inches tall.  Most of the shapes are various AccuCut dies and Cricut shapes that I had floating around.  The felt shapes were glued to the felt (use small dots to adhere if you are going to sew too).  To outline the shapes, I used a blanket stitch.  The book is bound together with 1 inch binder rings.


The purple one is my favorite because the wings actually flap!


If you decide to make one on your own, expect to spend 2-3 hours on each page.  These take a lot of time to put together, but the giftee will love them!


Tuesday, December 18, 2012

Handprint Christmas Trees

My nieces (and now 1 nephew) and I have always tried to come up with a Christmas gift that they all can work on that we can pass out to the aunts, uncles, and grandparents on Christmas Eve.  This year we decided to make handprint Christmas trees.

Supplies Needed
  • We used an 11x17 canvas from Michaels because they sold them in a 7-pack and the size was big enough for everyone's hands.
  • Paint-green, brown, yellow, red, purple, blue, orange
  • Paper plates
  • Baby wipes
  • Ultra fine point Sharpie

We started this project on a day when all of the kids were at Nana's house.  Green paint was spread on a paper plate and each kid dipped their hand in paint and added it to the tree.  Our family is kind of large so we needed to paint five canvases.  Then we set them aside to dry.  This year we learned that babies don't always like to dip their hands into paint so it helps if you have a paint brush handy so you can paint their hand as you spread out their fingers.
 
On a different day, one of my nieces and I sat down and finished the pictures.  I added stars to the top of the trees and trunks to the bottom.


We added a garland to each tree using our fingerprints.

 
My niece had a great time adding ornaments in different colors.  You will want baby wipes handy as they are great for wiping fingers in between the colors.
 
 
I am kind of impressed by how they turned out!  We are going to take an Ultra Fine Point Sharpie and label each hand and add "2012" to the side of the canvas.  This weekend the girls will wrap the paintings and decide who gets what and we will pass them out for Christmas.

Shape Clifford Craft

We are preparing to celebrate Clifford's 50th birthday this February with a big birthday party.  While it is slow over the holidays, I came up with this pattern.  I like it because it uses shapes to create Clifford's face.


Supplies Needed:
  • 2 pieces of red paper
  • 1 piece of black paper
  • 1 piece of pink paper
  • 1 piece of white paper
  • 1 glue stick
  • Shape Clifford pattern
When making them with a group of toddlers or preschoolers, I precut all of the pieces so the kids just have to glue.

Thursday, December 13, 2012

Chocolate Handprint Reindeer

One of our biggest activities of the year is making chocolate handprint reindeer ornaments in December. 
 

Supplies Needed:
  • White cardstock circles for handprints.  We have a circle cutter that makes 6 inch circles that works great.
  • With a group this size, we use 3 large boxes of chocate pudding.  Make it according to the directions on the box (so you will need a gallon of milk too).
  • Disposable foil trays to hold the chocolate pudding
  • 3 rolls of ribbon for hanging
  • Sticker eyes
  • Red circle stickers (We use Avery #5466)
  • 2 rolls of paper towels
  • 1 package of baby wipes
  • A couple of brown crayons
  • Access to a laminator
Registration:
With 2 librarians, we run through 80-90 kids comfortably in three hours. I would encourage registration. We stagger the registration times by age every thirty minutes. For example, 9 & 9:30 are 0-24 months, 10 & 10:30 are 2-3 year olds, and 11 & 11:30 are 3-6 year olds. By doing it this way, you can keep the group smaller with the babies, who will need more help (we run 10 in a time slot) and increase the attendance for the older kids (15 3 year olds). Since we do registration, we have an Avery address label already printed up with each child's name and the date that we put on the back of each circle.

Also, if you advertise the program, make sure you use "chocolate pudding" in the program description.  Some children with food allergies will not be able to do the project (or you can pull out brown crayons for them to make their "hand").

How the Program Works:
The kids come in and make their handprints using chocolate pudding.  We let each child make 1 print.  (Some of the moms will ask to redo them because they don't always look like hands, but once you add eyes and a nose, it will look great.)  We lay all of the circles out to dry.  Some will be done in an hour, but many will take 12-24 hours.

On the staff side, we add sticker eyes and a nose when the pudding is dry.  The circles are run through laminator, a hole is punched in the top, and a ribbon is strung through to create an ornament.  When we advertise the event, we also advertise a pick-up day that is 4 days later so we can get our part done.

Why we do this:
First, this is a lot of fun.  As kids make their handprints, you can also suggest to parents that chocolate pudding is a great way to fingerpaint at home (trust me, they love new ideas).  Secondly, as kids pull out their ornament year after year, they will remember that they made it at the library.  It is a great plug for us!

Miscellaneous Stuff:
  • You will want a couple of brown crayons for kids with food allergies or those who don't want to get dirty.  We were really surprised last year when kids did not want to put their hands in chocolate pudding (about 1/10 of the kids).
  • When trying to get the kids to put their hand in chocolate pudding, we told them to make a "high-five" in the pudding and then on the circle.  They understood this much better than their mom telling them to spread out their fingers.
  • The gloppier the chocolate pudding on the handprint, the longer it will take to dry.  If you are in a hurry, you can either blot the glops with paper towel or use a plastic spoon to scrape some off before it starts to dry.
  • If you use a hot laminator and there are glops, the pudding can melt and spread.

For some additional fun, here are some of the handprints that my nieces have made over the years!  After awhile, you do run out of room on your Christmas tree.


Related Posts Plugin for WordPress, Blogger...